


Recipe of the Day
Discover a New Recipe Every Day. Give Back With Every Bite.
Every day, we feature a hand-picked recipe for you to discover, cook, and share. The best part?
Every recipe you read helps feed the hungry.


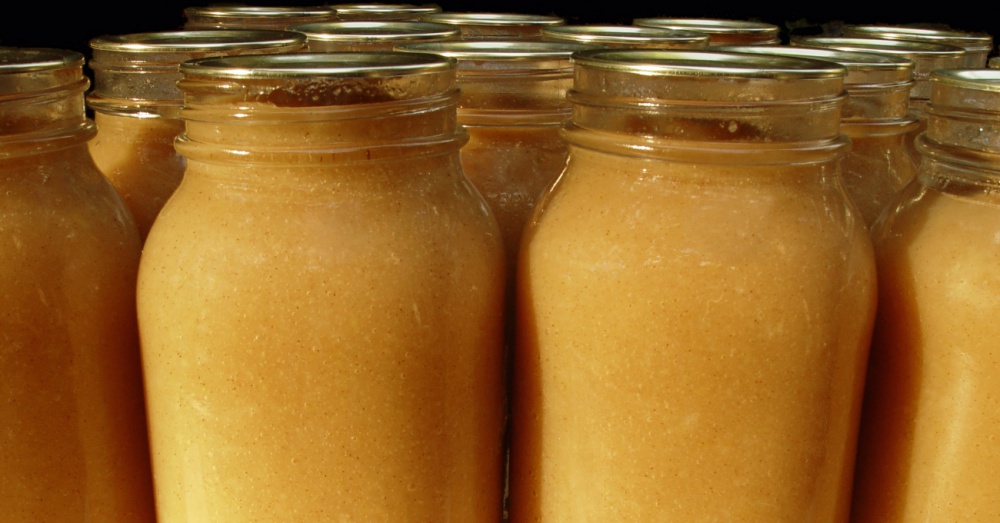
Canning can seem complicated and daunting, but in reality, it’s SO easy. And if you haven’t canned before, applesauce is the perfect place to start! Unlike jams and jellies, applesauce doesn’t need specific amounts of sugar or other ingredients to ensure that they’re safe for consumption after being stored. Apples are naturally high in sugar and acid, which means they’re perfect for simple water bath canning (and that also means you don’t need any special equipment).
The first step is to make sure that everything you’re using is squeaky clean. Bacteria is the enemy of canned goods, so you want to make sure that your jars are sterilized, that you’re using new lids, and that your pots, utensils, rings, and work surface are cleaned. To sterilize your jars, you can either run them through the dishwasher or boil them for a few minutes.

The next step is to prepare your apples. You’ll want to peel, core, and chop them, which can take some time. For one quart of applesauce, you’ll need six to eight apples and you can use any variety you’d like to. Granny Smith to Golden Delicious – they all work wonderfully. While it’s certainly not necessary, a tool like the Johnny Apple Peeler can save you a lot of time and effort here. It’s an all-in-one apple corer/peeler/slicer… it does all three jobs at once and it does it quickly!
Next, the apples go into a pot with a little bit of water on the bottom to prevent scorching, and you cook them until they’re tender and easily broken apart. You can sweeten them further if you feel that it needs it, or even add some cinnamon, but keep in mind that it’ll sweeten over time as it sits on the shelf. Once the fruit is tender, you can mash it all up with a potato masher or use an immersion blender for irresistibly smooth applesauce.
You then ladle the hot applesauce into the hot, clean jars, leaving just a 1/2 inch of room at the top (that’s called headspace). Run a tool of some kind (just not a metal one – a rubber spatula works fine) around the inside of the jars to eliminate any air bubbles and then wipe the rims of the jars clean with a clean towel.
Place the lids on top and screw the rings on finger-tight, then place the jars into a large stockpot filled halfway with warm water. If the water doesn’t cover the jars already, add enough to cover them by one inch. Bring it to a boil, and let the jars simmer for twenty minutes. If you live at an altitude above 1000, you’ll need to add on some processing time. Simply Canning has a great reference chart for processing times.

When your processing time is up, remove the jars from the water with a jar lifter if you have one, or very carefully with tongs if you do not. Place the jars on the counter where they can cool undisturbed. As they cool, you might hear a ‘pop’ as the lids seal. Once they’ve all cooled completely, you can remove the rings (it’s actually better to store the jars without them!) and check that all of the jars have sealed. To check the seal, simply press down on the center of the lid, if it doesn’t lay flat and pops when you press it, it hasn’t sealed. Jars that haven’t sealed properly can go straight to the fridge to be enjoyed right away, and jars that have sealed can be stored in a cool, dark place for 12-24 months.
Canning applesauce is a fun project that anyone can do, and the results are undeniably delicious. (It really is leagues above storebought, pinky promise.) Put in a little effort now and you’ll have the comfort and homemade taste of the fall season all year round!
Canned Applesauce
Ingredients
- Apples of your choice (6-8 apples make 1 quart of applesauce)
- Granulated sugar, to taste
- Large stock pot or water bath canner
- Canning jars
- Canning lids and rings
- Jar lifter
Preparation
- Peel, core, and chop apples apples into slices. Add apples and 1 cup of water to a large pot and cook over medium heat until tender, stirring frequently.
- Once tender, mash apples with a potato masher or blend with an immersion blender until smooth. If you'd like a thinner consistency, feel free to add a little water here.
- Taste applesauce, and add sugar if needed. The applesauce will sweeten over time, so take care not to add too much.
- Fill sterilized jars, leaving 1/2" of headspace. Using a non-metallic utensil, slide it around the inside of each jar to release any air bubbles. Wipe each jar rim clean, then place lids and rings on the jars.
- Fill a large stockpot or water bath canner halfway with warm water. Place the filled jars into the canner or pot, and add more water until they are covered by 1 inch.
- Bring water to a boil and process for 20 minutes (for altitudes less than 1,000 ft). For higher altitudes, please check your processing time on a canning chart.
- Remove jars from the water with a jar lifter, and allow to cool undisturbed. As they cool, you'll hear a pop as the jar lids suck in and seal. Once cool, check seal by pressing on the center of the lid. Remove rings and store in a cool, dark place for 12-24 months.
Adapted from Frugal Living NW.